Do you want to display gridlines when printing your Excel documents? In this article, we'll show you how to do just that. Let's get started!
By default, gridlines in Excel projects do not appear in the printed document. This can keep your papers clean, but sometimes you may want them to be visible on the paper. There are two ways to do this, both of which are described below.
The process is quick and easy. All you have to do is follow our step-by-step guide to learn how to add gridlines when printing Excel documents.
Add Print Gridlines in Excel for Windows
The following steps apply to the Windows operating system. Our guide was written using Excel 2019 - some steps may be different in earlier versions. If you need further assistance, please feel free to contact us.
Select the Worksheet: Choose the worksheet you want to print. When you select more than one sheet, the text [group] appears in the title bar at the top of the sheet.
Tip: Click any unselected worksheet to deselect multiple worksheets. If you don’t see unselected worksheets, right-click the TAB of any selected worksheet, and then click Uncombine worksheets.
Switch to Page Layout Tab: Go to the Page Layout tab in the ribbon interface at the top of the software. Click the Print check box below the grid.
Note: If the Print check box is grayed out, you may have selected a chart, image, or other object in the worksheet. Deselect and try clicking the check box again.
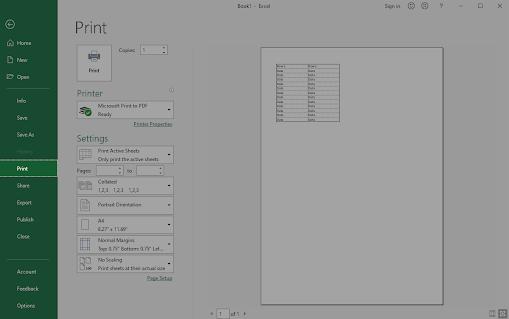
Print: Next, switch to the File tab in the ribbon and click Print. Alternatively, use the Ctrl + P keyboard shortcut to jump to the function immediately.
Click the Print button.
Preview Gridlines: To preview how the gridlines will look in the printed document, press Ctrl + F2 to open the File tab, which shows a preview of the printed worksheet.
Print Empty Cells: Remember that gridlines are only printed around the data in the worksheet. To print gridlines around empty cells, set the print area to include these cells.
Add Print Gridlines in Excel Online
Microsoft allows you to use a simplified version of Office online for free. Fortunately, printing is one feature retained in Excel Online that allows you to print gridlines. Printing gridlines itself is not supported at the time of writing, but you can use borders as a workaround.
Here are the steps you need to follow to simulate gridlines and print them using the free Excel Online tool:
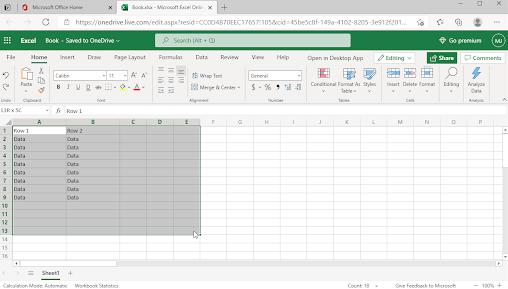
Open Excel Online: Navigate to www.office.com in your browser. Sign in with your Microsoft account, then create a new Excel Online document or open an existing one.
Select Cells: Click and drag the cursor to select all the cells you want to include in the print. Make sure to select any empty cells that you want to use as grid lines.
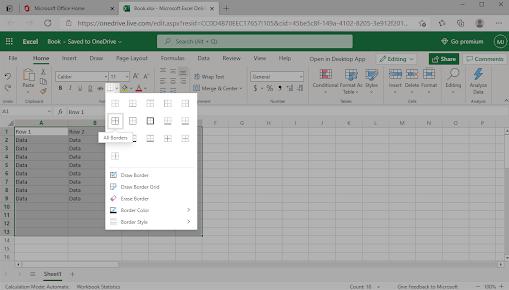
Apply Borders: Switch to the "Home" tab and click "Borders" → "All Borders." You should notice that the gridlines around the cells are darker than the rest of the workbook.
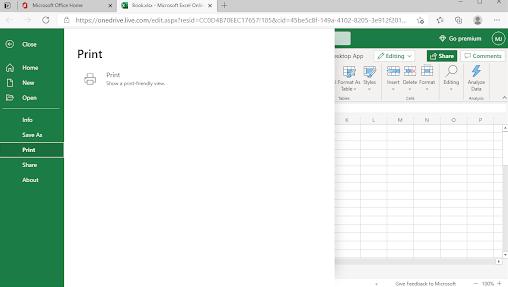
Print: In the Ribbon header interface, click the File menu, then switch to the Print tab. Here, click the Print button to see a preview of the worksheet.
Customize Gridlines: To customize the gridlines, simply click the Back to Workbook button and edit the borders around the cells. You can edit the color and style of the border.
Fix Excel Gridlines Not Showing When Printing
In some cases, you may not be able to print gridlines in Excel. This can be caused by a number of reasons, such as incorrect configuration or outdated drivers. If Excel gridlines don't show up when printing, let's see how to troubleshoot them.
Method 1: Turn Off Draft Quality
In the Windows version of Excel, you may have problems previewing gridlines in the print window due to a feature called "draft quality." Essentially, it degrades the quality to show a faster preview of how your document will look on paper, which can result in gridlines not appearing.
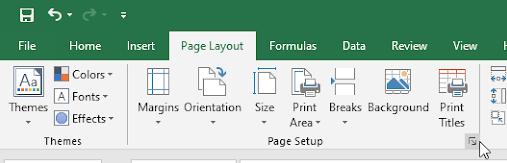
Access Page Layout Tab: Switch to the Page Layout tab in the ribbon interface. Click the box in the corner of the Page Settings section, as shown below.
Alternatively: Use the Alt + P shortcut key to access the shortcut menu, press S, and then press P on your keyboard to open the Page Settings dialog box.
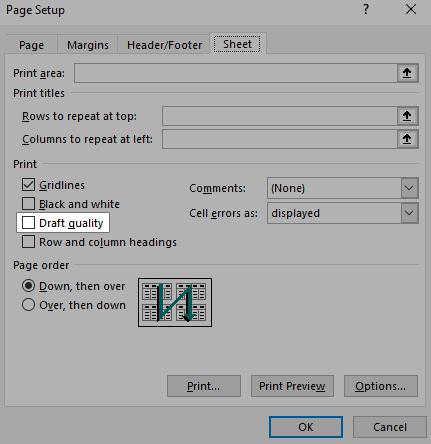
Disable Draft Quality: Make sure the check box next to draft quality is empty. If this option is selected, simply click the box again to remove the check mark.
Click OK. Navigate back to the Print menu to see if the gridlines are displayed correctly in the print preview.
Method 2: Update Your Printer Driver
If the grid lines still do not print successfully, there may be a problem with the printer driver. In this case, download the latest driver from the printer manufacturer's website.
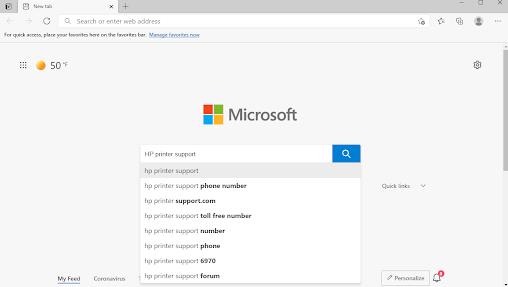
Find Support Site: Check the printer manufacturer's support site. To find it, search the Internet for the name of the printer manufacturer and the word "support."
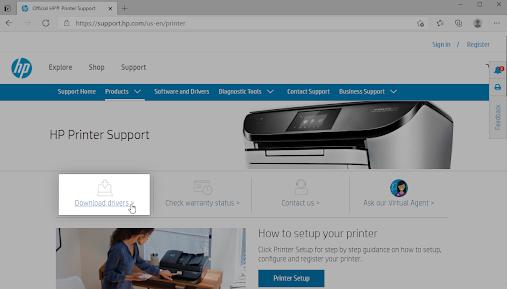
Download Drivers: Find the driver download section. This can usually be found on the manufacturer's printer support page or in a separate download section.
Get the latest drivers for your printer and then install them on your device. You may need administrative rights to perform this step.
Restart Computer: After installing the new driver, restart your computer and try printing the Excel document with gridlines again.
Need some help? Check out our guide on how to make local users administrators in Windows 10.